The toolboxes

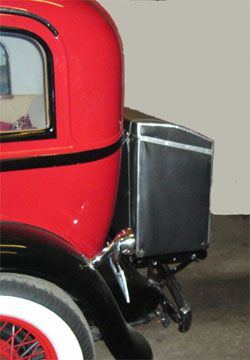
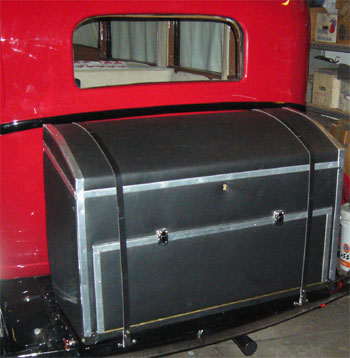
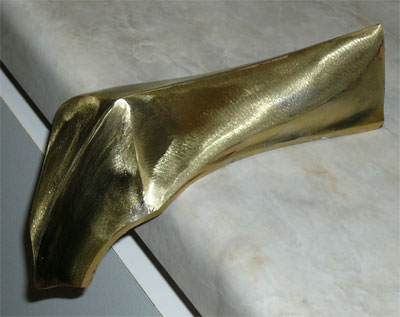
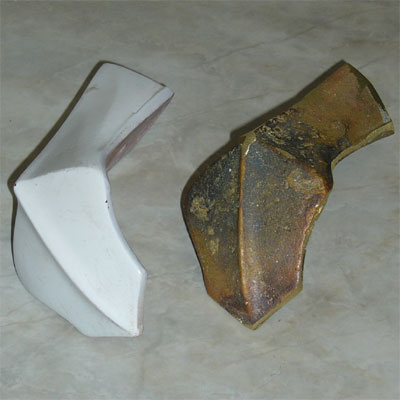
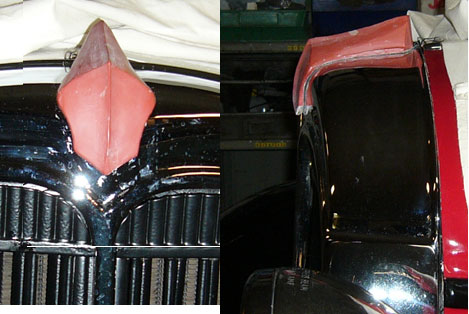
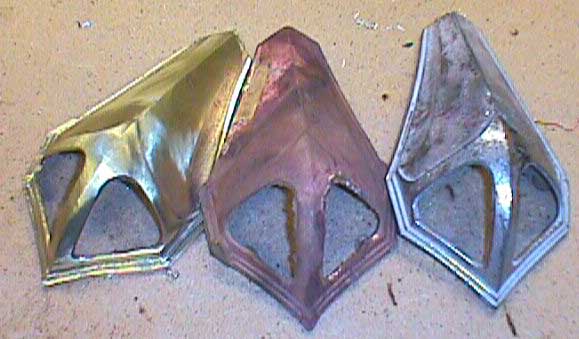
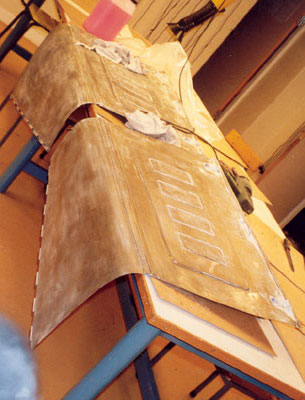
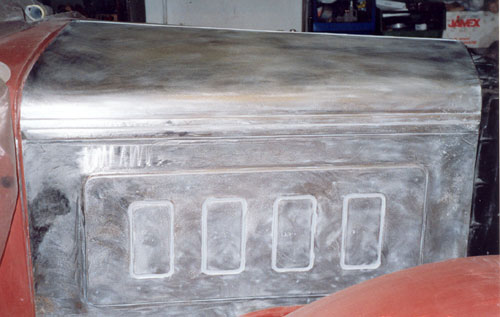
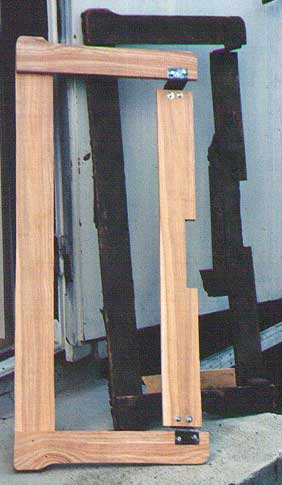
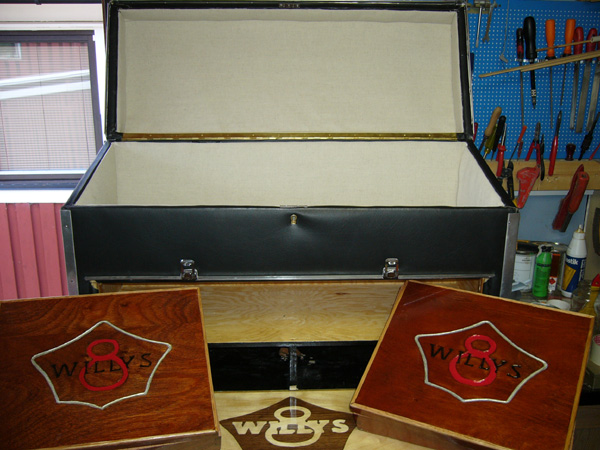
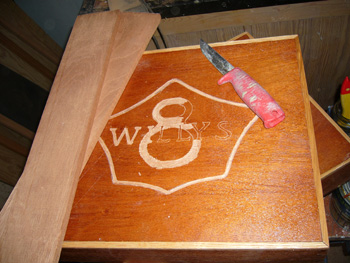
The toolboxes are now ready .After cutting and gluing the pieces together the next step was to carve in the Willys emblem in the mahogany. I have not made interior in the boxes yet.They match the intarsia emblem good.
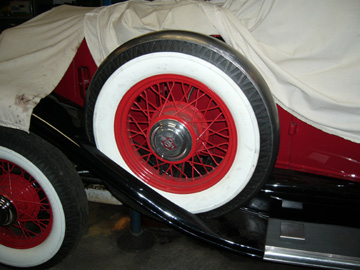
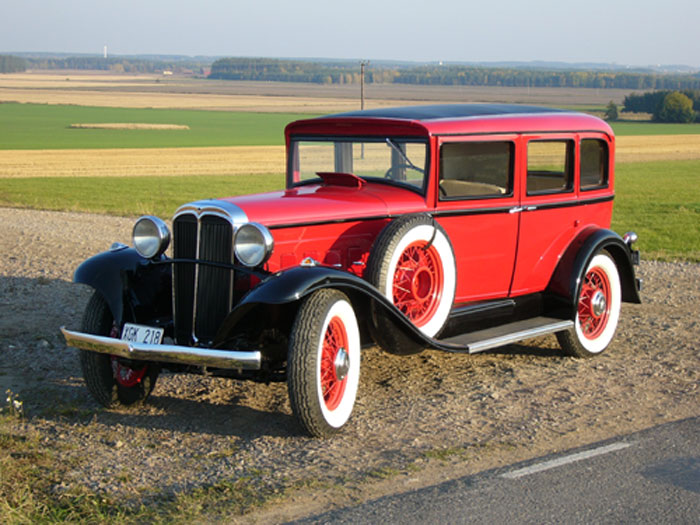
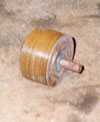
The wheel covers is mounted and chromed. I have mounted the rear mirror on the covers.
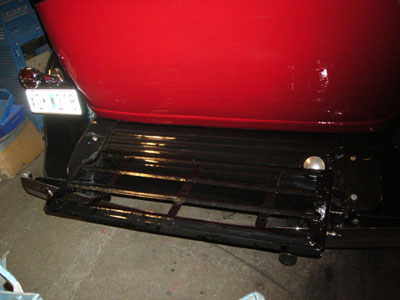
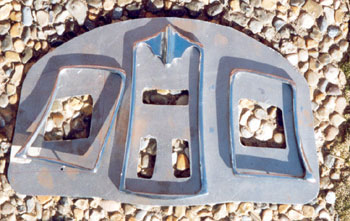
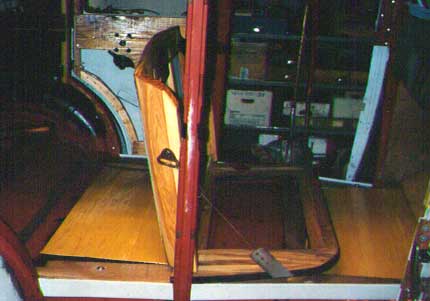
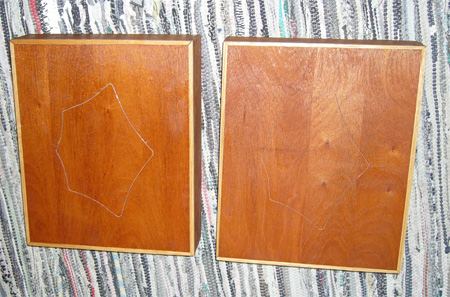
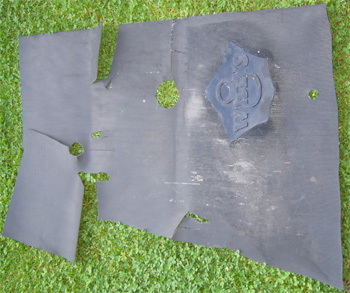
I tried to make an emblem in the rubber mat on the floor in the drivers side the logotype is similar to that one I have carved on the boxes. That made me thinking of to make some to the footsteps rubber. I have only begun to translate the picture into CAD to get it cut by a machine.
The summer in Sweden has been much rain but not so many hours of sun.
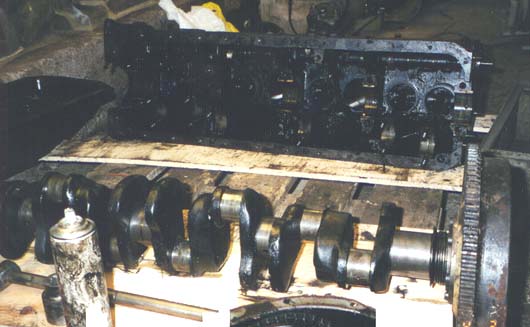
The valves is adjusted to the recommended measures .The engine sounds well.

toolbox4

toolbox3

toolbox2

rubberorn2

New knobs

Since last I have done new knobs for the H and S in harder plastic.
The letters on the knobs is also new. The knobs have been painted in the same way as before.
The carburetor is still in the shop.
The wheels covers is in the chrome shop for chroming they said that it would be ready in late April.
I have bought a NOS windshield vacuum wiper .I have mounted it in place. The copper line is in place but not attached to the body and the manifold yet. I shall also buy one more wiper blade with parallel stay and pivot.

whlcover2

wipercart

wiper

Interior and carburetor

Even if the most of the big restoration work is done there is still much to improve.
I have mounted a roof lamp which is controlled from the dash.
The ignition coil had to bee changed because it was burned. A new one was bought.
The trunk in the rear is in place and there is still some clothing and a couple of boxes in the bottom that I shall make for tools and service.
The carburetor problem is still much thinking about.I have got a Carter BB1 with accelerator pump there is some of the internal service to be done some of it is stuck!
The water temperature gauge is not showing correct temperature so I have made an experiment with one IC circuit that helps to show the correct temperature. Next step is to dismount the temperature sensor and make a test bench for that and the gauge and see what that gives me.
I am thinking of making two spare tire covers in steel….
Beside all that I have driven the car around and …..just enjoying it.

reartrunk1

reartrunk

rooflamp

IC

Radiator mascot,interior and springs

I have made some work even if I not written since last year.The radiator mascot is grinded and polished so it would be ready for the chroming shop.
The interior in the rear is new material bought and fastened in place. The cushion is to bee more hard it is now to soft. The backrest would also be adjusted against the side panels.
The rear springs are dismounted and the blacksmith shop helped me to bend them into the right shape again. I have sent leafs to the shop that helps me with the hardened process of the leafs.
The rear trunk work has started. The trunk is glued together.

mascot4

mascot2

Small fixes

It is still some work to be done.
Such as painting the knobs for the dash.
The upholstery on the doors round the windows is some changes made so that the upholstery fits better to the channels. The pillar between the doors at both sides is new wood made for the upholstery.I have delivered the prototype for the radiator mascot to the foundry that makes it in brass or bronze. The ashtray is missing but the surroundings is mounted in the front backrest rear.
The gasoline gauge t is filled with red liquid I have not tested if functions ok yet. The gauges is not mounted in the dash, I am still waiting for the water temperature gauge from the shop.
For the rear trunk have I made some measures and planning how to cut and put it together.
I wish You all a Merry X-mas !!!!!!!!!!!!!!!

luguage

knob1

protoornament

intside

ashtry

Short trips

I have made many short trips in the neighborhood.
The work with the small things in progress.
I have made two copies of the knobs on the dash. The first step was to lay the original knob in a clay form. The clay dried for a couple of hours. Then I placed the new wire in the form and filled plastic padding in the form and waited. After a about twenty minutes the plastic had hardened . Then I took the clay away and the next step was to make letters and paint the knobs..

octcar

knobclay3

knobclay2

knobclay

Frame ready

The most of the frame is ready with mounting the fuel line from the gas tank which also is mounted. The body is ready from the paint shop. The mounting of the front window with the rubber around .The tube for the ignition cables was made and mounted. The many small items that has been to the chrome shop has arrived.
I have worked both day and evening trying to get ready to 8th August to register and get number plates for my older sons wedding the 27 August!!!!!
The last days I have mounted the most of the wiring and connected it all according to the electrical scheme. The radiator and the shell is also mounted in place
I have also got the inner roof done .Mounted the dashboard and some of the instruments. The engine has been running for total about 30 minutes and so it happens -the rear frost plug went out and all the water went out!!!! Much work!!!

bodypaint

front

innerroof

floorfront

dash

chromeparts

Instrument panel

Just now there is much of the work that has been done, started and finishing at the same time!!!
That is the hole instrument panel was delivered to me from WOKR member Sven Olof Johansson in Sweden .He called me on the phone and said that he had one panel with bezel and the temperature instrument with amp and oil with parts to the fuel. I had to make some parts to the fuel gauge and repair the copper line. The panel with the figures is a new scale being made. The gauges for speed and temperature are handed over to a shop that makes a new speed cable and sensor to the temp gauge ..
The panel and the inside window panels is delivered to the paint shop. The wood graining will start direct after that he had laid a layer of base paint. The pieces that going to be painted black is delivered to the paint shop.
The cylinder head was soldered with high temperature metal powder that melts in the crack. The head is then straightened and painted.
The brake cables is being done and new cables is made from an SAAB handbrake with little modifications. It means making rivets, cutting cable and making new ends.
When measuring the foot step rubber I got an idea of making a pattern from the wheel hub and make a bigger pattern in the rubber mat.

instrument1

top

Handels and cylinder head

The most of the time this last month I sanded and polishing the indoor handles, riser handles and park light .In the riser handles I drilled a hole so they will fit inside the door .
The old door knobs where reconstructed with new pins and the end there where tapped to fit in the handle for a screw.
I have made new escutcheon for the outside handles.
The cylinder head is moved to a shop that could repair the small crack .He would fill the crack with powder and heat it up and let it cool slowly before he straighten it up in the mill.
The shock absorber that was so bad has got new pistons, springs, washers ,new lock bolt , new tapped filling hole with a bolt and a new big plug washer. The three others was only to refill with oil.
I whish all of you who is follow my job a Merry Christmas and a Happy New Year.

parknew

invhand

insidvev

handring

allagjut

sirutabak

Waiting

The project has gone in some what slow motion. I am waiting to get the paint on the car. Just now I do not know how is going to do the job.
The making of new handles inside- and riser handles, parking light and the small riser handles in the rear is going in a new phase. I have got them from the foundry and I am now sanding and polishing them for chroming.
The radiator shell and some other small things is ready and waiting for me to pick them up in the chrome shop .
I has finished the work with the dots or badges that holds the bumper in the middle. You can also see that I made new wing screws for the luggage holder they are ready for the chrome shop also.
The cylinder head has still a small crack between the water hole and the no.1 spark plug hole. That despite welding with special stick. I am thinking of what to do. I have some ideas that I have not tried yet. So still there is hope.

badwing

instrumentpanel2

shock1

shock2

Went on making

Went on making the bezels for the instrument panel. I started with making many test bending in copper because of it is much easier to chromate them later. After thinking and making a toll to press the bezel in the middle I got an idea of making it all in iron and then polish and hand them over to a shop for chroming. I decided to do so because I should only make one of each bezel. First I cut a 6x6mm long bar then I bended it with hammer so it would have the right inside measure .Then I made one fourth end ,the short end and welded it place. I finished with filing and sanding so the would fit in the panel. This was the procedure for all three. It all ended up with polish it all to be chromed. It is nearly the same measure like the original.
I also made the button from the steering wheel I turned it from an bakelite round piece .I thanks John Stokes for his concern sending me a photo of the steering wheel from there I could make somewhat similar button.
To the water temperature instrument I made a new scale look better out when mounting in the instrument.
The thermostat issue I tried to solve in an various of ways. I was talking to my brother he said:-“Try a VW thermostat”. I did so and it is somewhat smaller but is works. It looks like it moves in the same way and in the same length. I have got many figures and ideas from Lloyd Gauerke so I could compare his information with what I tested .I have not tried it in the car yet.
The shock absorbers is just now undertaken a big dismantling one is only to fill with new oil the others need more job. The fourth is rusted and stuck I needed to crack one piston.
The hood had shown some mysterious spots. It was rust! I decided to sand it to bare metal and after that some acid that get down to the small spots and removed the oxide.

button

instrumentpanel1

radiatshell2

termostate

shell1

shell2

Radiator and steering

There is not so long ago that I wrote in the dairy but there is some small goals that has been achieved.
The first “big” surprise the last month has been when the radiator shell and the headlamps came from Greg that had delivered the package to Hershey swap meet where my helping hand picked it up and sent it to Sweden. When I fetched the package I also find an universal joint for the rear axel connection that Kjell in Örebro had in his barn.
After much trying and lot of muscle , warming and a lot of thinking at last the steering wheel could be loosen from the steering column. The outer pipe was very damaged and rusty which I changed to a new one.. The contact in the bottom of the steering column where cleaned and the long rod where also new and with the ingenious connection to the contact which I found much information on the WOKR website. The hole steering mechanism where at last painted black. The steering wheel is now being restored. I should also make a new button at the top that fits to the steering wheel.
The front floor ,the toe board and the plate under the front seat has been mounted. The picture shows also the iron that holds the front seat mechanism.

floorfront

frontseatplate

radiatshell1

steeringw1

Information and dismounting

Hi everybody that is enjoying my job on this project. I hope that you not have been disappointed when visiting this site and seen that I have not written anything during July.
When Kjell visited me in May he took some photos of me and my car. He also took a trip to Sören and looked on hiscar.
There has been many mails to WOKR members trying to get information regarding the front axel. I have also got some help from everyone that answered. That ha give me a solution to the front axel adventure .I have disabled the axel into some parts that would got to be sandblasted and the parts that I have cleaned myself.
All the hydraulic shock eliminators has been cleaned and is ready for new oil and paint. The transmission mounted but there is one part missing. The flywheel house cover with axel machined and pedals with new made bushings. All has been cleaned and ready for paint.
The front window is dismounted in all it parts remounted ready for paint and glass. The petrol tank is in progress with a helping hand from a workshop and then I made the sides and mounted the tank filler neck .The gas gauge is not yet installed. The rear trunk luggage rack is fitted in place When working with the rack I discovered that the rear bumper is missing anyone that have measures

clutch

frontaxel1

frontaxel2

gastank1

gearbox3

jag

soren

paketh

shockabs

TEST

kjell

The spring cushion and frontaxel

The spring cushion is going to be fitted in place and I have to talk the person who is going to help me I have also been repairing the rear axel for the Whippet 96 it was leaking oil into the brakes which I was forced to repair.
The front axel chapter is in some progress I have some doubt about the strength which one to choose but it seems just now that I will choose the axel from the Willys 97.The drum looks very good and I am forced to drill for the wheel bolts so that they will fit my wheels. Some e-mail has been sent to members in the WOKR that perhaps has some answers.
The plate that covers the gas tank has a new one been made. First to make a tool that make ribs and then an other tool that make the round hole. When they have been stamped I made the plate to fit the curve on the frame and last to fit proper in place
A new bushing for the main shaft in the gear box has Sören made to me. He also has fitted the new ring gear to the flywheel.

cushion

framaxelint

frontaxel97

gashole

gasplate

gastool

startkrans2

whippet

I have not done

I have not done so much this month.I have been busy with painting and restore in our house.
Much of the work is just now of waiting that other people that helps me finishing there part.Such as bearings for the rearaxel and the gearbox, the rearsprings,gasoline tank, the engine and the ring-gear to the flywheel.
Here is some pictures for rearaxel .It is true that the International Truck of 1937 fits for the Willys!!!!!!!See picture.See picture.Thanks to John Stokes!
Here is more pictures.The floorboards is ready to be cut in the correct size.See picture.
The front and rear seats is new.See picture.See picture.See picture.See picture.

bakax

bakax1

baks1

baks2

floor

frams1

inred6

Under the first weeks

Under the first weeks in June I have made a lot of work. The rear axel from an 1937 International Truck is dismounted and found being nearly the same measures the ratio is 11 to 46 which is some less in against 10 to 44.
Now I would dismount the rear axel of the Willys and see if there is the same measures and then I can mount the things together in one rear axel.
The floorboards in plywood has got an layer of Ash-tree and then being measured in the right size. The edges is being glued. Then it had been painted black in the outside and inside it is being varnished.
The plate floor I had painted black on the outside.
The gearbox is totally dismounted and bearings and the main bushing is new .The gearshift end is yet missing.
New pistons, pistons pins and rings are bought and waiting on to be mounted when the engine is machined.
The rear seat and back had got new wooden frames and ready to be mounted with the cushions which I going to be made!!!

I have made frontseat

I have made completly new rest back and the seat frame in wood for the front seat.With the old hing and reinforcemnets plates.All that job was taken me nearly all the time in april!
I have welded the wheel trunk in the right front fender.See picture.
In the left front fender i have repaired and welded some big pieces in the trunk.
I have also mailed again to Greg and asked for drawings of radiator shell and pinion and king gear for the rear axel
I hope I have an contact that can make new ones for me after the drawings.
The rear spring is also in progress I have make an contact that would help me to make spring leafs.

reservb

Get on to fitting doors

Get on to fitting the doors in place. Sent door on left side,hood and other things away for sandblasting.See picture. Kjell from Örebro phoned and said that he had head gasket I said I would by it. He would also be looking for starter, generator, carburetor, instruments and radiator shell. Fitting all the wood in the rear from the doors and back went on making and replacing all the wood and it is ready to be lacquered and place permanently in place. It is a satisfaction when you place the old piece in the place with new made wood around it. And it FITS!!!!
The floorboards in steel, in the rear, are being to be fixed and all the rust holes is replaced.

door1

inred1

inred2

inred3

Sent the motor block

Sent the motor block away to make new crankshaft babbits and arbor it. Begin to make wood to doors and renovate all mechanics.See picture.
Pressed one panel and went on fitting by using an English wheel but I failed and made second one that one I missed in measuring at last I made one more and fitted it by using an stretch and bend tool. Welded it in place and about 60 hours later.See picture.
Made wood to the front door and placed all the mechanics in the right place.
Mounted the doors in place and get an first hint in fitting it.See picture.
Renovated the crankcase welded and painted it on the outside.

door2

passning2

Took the rearaxel apart

Took the rearaxel apart and the speval bevel gear was missing! Know I have an pinion but no rearaxel that it fits to.It is only to fix another rearaxel!
Loosen all cylinder head bolts one is broken and I have some trouble take it away and the same thing with the manifolds bolts three of them is stuck. See picture, nr 1 or nr 2.
Fitted the woodframe to the body and fitted it all together and the floorplates in the rear and in the middle was in place so that I was needed to cut and repass the woodframe.
Cut of the rearbody from the torpedo so the hole car is in three parts.
Beginning to loosen all the woodparts from the body and cutting all the bolts away.

engine1

engine2