Handels and cylinder head

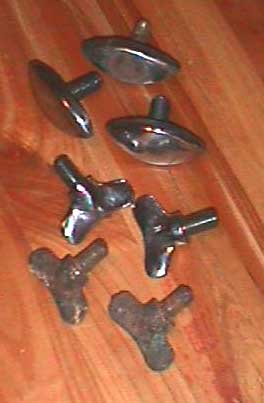
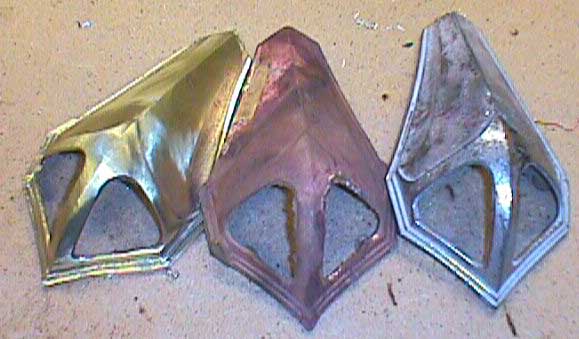
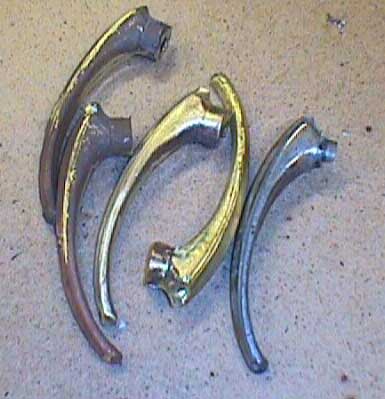
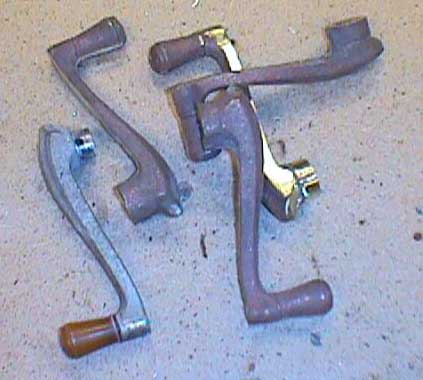
The most of the time this last month I sanded and polishing the indoor handles, riser handles and park light .In the riser handles I drilled a hole so they will fit inside the door .
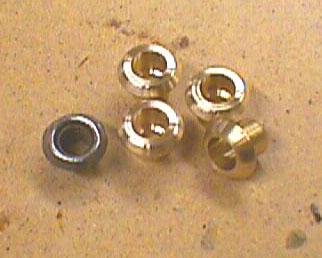
The old door knobs where reconstructed with new pins and the end there where tapped to fit in the handle for a screw.
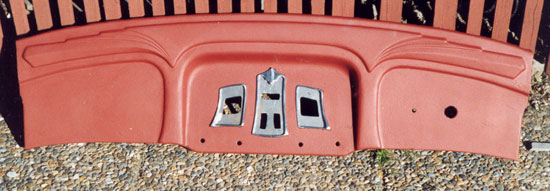
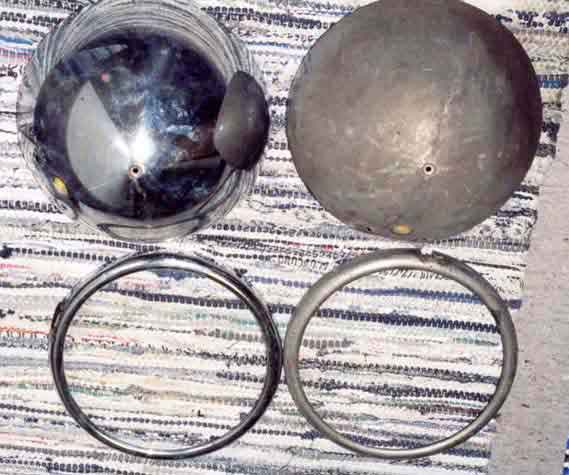
I have made new escutcheon for the outside handles.
The cylinder head is moved to a shop that could repair the small crack .He would fill the crack with powder and heat it up and let it cool slowly before he straighten it up in the mill.
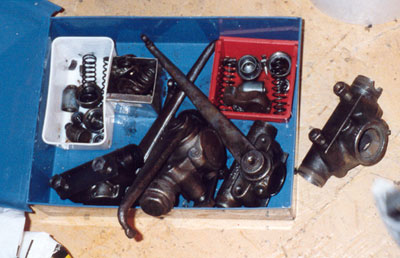
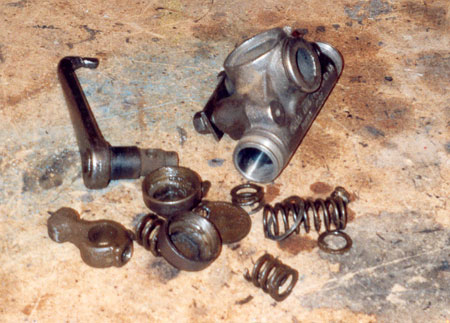
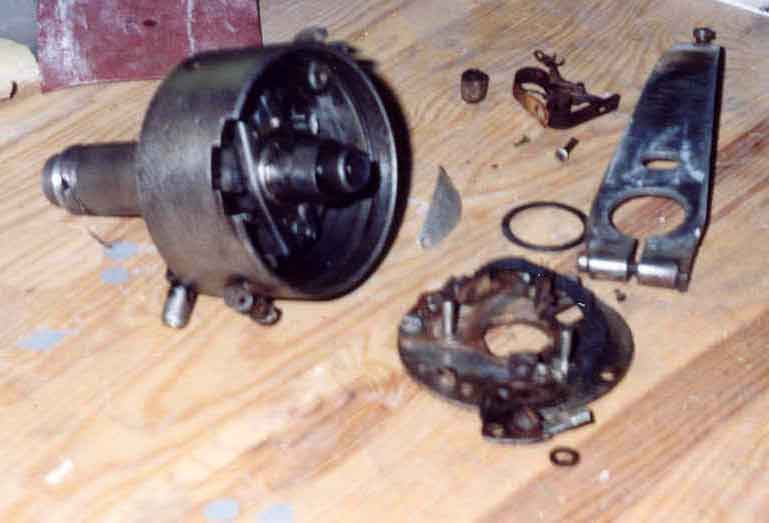
The shock absorber that was so bad has got new pistons, springs, washers ,new lock bolt , new tapped filling hole with a bolt and a new big plug washer. The three others was only to refill with oil.
I whish all of you who is follow my job a Merry Christmas and a Happy New Year.

parknew

invhand

insidvev

handring

allagjut

sirutabak

Waiting

The project has gone in some what slow motion. I am waiting to get the paint on the car. Just now I do not know how is going to do the job.
The making of new handles inside- and riser handles, parking light and the small riser handles in the rear is going in a new phase. I have got them from the foundry and I am now sanding and polishing them for chroming.
The radiator shell and some other small things is ready and waiting for me to pick them up in the chrome shop .
I has finished the work with the dots or badges that holds the bumper in the middle. You can also see that I made new wing screws for the luggage holder they are ready for the chrome shop also.
The cylinder head has still a small crack between the water hole and the no.1 spark plug hole. That despite welding with special stick. I am thinking of what to do. I have some ideas that I have not tried yet. So still there is hope.

badwing

instrumentpanel2

shock1

shock2

Went on making

Went on making the bezels for the instrument panel. I started with making many test bending in copper because of it is much easier to chromate them later. After thinking and making a toll to press the bezel in the middle I got an idea of making it all in iron and then polish and hand them over to a shop for chroming. I decided to do so because I should only make one of each bezel. First I cut a 6x6mm long bar then I bended it with hammer so it would have the right inside measure .Then I made one fourth end ,the short end and welded it place. I finished with filing and sanding so the would fit in the panel. This was the procedure for all three. It all ended up with polish it all to be chromed. It is nearly the same measure like the original.
I also made the button from the steering wheel I turned it from an bakelite round piece .I thanks John Stokes for his concern sending me a photo of the steering wheel from there I could make somewhat similar button.
To the water temperature instrument I made a new scale look better out when mounting in the instrument.
The thermostat issue I tried to solve in an various of ways. I was talking to my brother he said:-“Try a VW thermostat”. I did so and it is somewhat smaller but is works. It looks like it moves in the same way and in the same length. I have got many figures and ideas from Lloyd Gauerke so I could compare his information with what I tested .I have not tried it in the car yet.
The shock absorbers is just now undertaken a big dismantling one is only to fill with new oil the others need more job. The fourth is rusted and stuck I needed to crack one piston.
The hood had shown some mysterious spots. It was rust! I decided to sand it to bare metal and after that some acid that get down to the small spots and removed the oxide.

button

instrumentpanel1

radiatshell2

termostate

shell1

shell2

Summerjobs

Wondering what has happened with my project????
In this summer the Willys 8 project has been going in slow motion because of working in our house with repairing ,building and setting wallpaper in the kitchen followed up with rebuilding the bathroom and shower. That has taken the most of my time this last months.
But …..
There has been some progress in the Willys project :
I have made the installation of the roof top .Beginning with jute pad in the bottom which was nailed in place .Next step was to lay the synthetic padding and finish with top fabric . I have also fasted the aluminum rail to see how it all will fit it will be taken of before the painting.
The steering wheel was repaired and painted the job that remains is to make a button .I have also started making the chrome rings for the instrument panel
The radiator shell and some other things has been delivered to a shop that would help with chroming.
I have found a Carter BB 1D carburetor that need some work but I think it would fit.

carb1

steeringw2

tak

tak1

tak2

tak3

tak4

Radiatorshell

The work since last has been concentrated to the radiator shell. New plate in the bottom has been made and fitted in place. After that welded and grinded and welded again some times just now it looks good. It is still some work to be done before I hand over to chroming.
I have also made new garnish moldings to the rear window. For the lower molding was a tool made to get the right look regarding to the other windows. There is some work left before it would be finished.
The front axel was mounted to the frame and the bearings ,drums with new paint and wheels was mounted. The brake shoes was cleaned and ready for new linings to be glued in place.

radiatshell2

Engine work

The work from February is proceeding with mounting the oil pan which had become a layer of black enamelbefore mounting with new made gaskets. The floating oil intake was mounted. When mounted all that I turned the engine and made a bed of wood so that would be easier to mount the rest in upright position. I has also adjusted the valves to 0.010 ” clearance. The new timing chain as mounted and a new ignition mark was stamped on the flywheel. I made new washers for the freeze holes.
I have mounted and fitted the clutch assembly was forced to change the bolts into new with insex heads because the where made in the highest quality. The clutch plate should I send to someone can make new discs.
The man that is helping me with painting the car has inspected the work that has been done by me. He took a careful examination. He said it would be nice to paint it. I could dismount the fenders and the other plates.
Now it is only for me to choice colour !!!!!
The radiator shell ,headlamps and the front bumper is proceeding some what .The shell is dichromate and ready for repairing Which I should do later. The head lamps was undertaken a cleaning with some light acid .The results was astonishing .OR! The bumper is going to be sanded by me later.
The front axel is ready to be painted and mount the bearings after new bushings and king pins.

frontaxel4

kylm

lamp

oilpan1

oilpan4

Mounting the engine

The most of the work the last month has been regarding to the engine. The first item that I mounted was; the crankshaft and mounted the main bearings. It felt ok when I draw the crankshaft around a couple of times. At the 0,030 oversize pistons Imounted the piston rings . There where 2 of the oil rings. The lower one I was forced to file to make the right end play which I choose to 0,40mm .Which ended up with that I filed and fitted each piston in each cylinder. When measuring the fittings of the piston pins I also grinded the holes to correct alignment. Even the connecting rod bushings was some needed to be refitted. The piston and main bearings mounting ended with securing it withcotter pins and wire . The distributor was undertaken a complete dismantling and cleaning all parts.Painting anddistributorremounting the most of the parts left to be done is mount it on the engine the adjust and synchronize the breakers.
Flywheel and the clutch faces where machined.
The fan drive pulley was machined ,cleaned and ready to be installed on the engine.
I had a talk to the shop that is doing the chroming to the lamps, bumper and the radiator shell. He had not been doing any work -yet.

distrib

drivep

engine7

engine8

flywheel1

ignition

Engine home

The year 2004 began with plastic filling the surface at rear doors. Then proceed with an layer of primer. The next step was too go further and do the same work at the rear fenders and the left front fender. That work was finished with a layer of primer.
The most exiting moment this month was when I went to the shop to collect the engine. The work that had been done is drilling the cylinders to 0.030 oversize pistons, new wrist pin bushings in the connecting rods, new valve guides for the valves that has been machined, new seats is machined to all valves both out and intake, one new cylinder sleeve to number seven cylinder and at last the hole block was machined to level . When examine the top I found out that the was an crack by the thermostat house and it was sent away to a shop to be welded and level it all to fit the engine.
After the engine come into the garage I cleaned all the threads. When that was finished I cleaned the hole engine and laid oil to all surfaces to protect it .All small items is cleaned and put in a pot of diesel
I has also began to measurer to the instrument panel and found out that was a possibility to use new instruments that would rebuild to fit in proper. BUT it would be nicer to have similar to the original.

engine5

engine6

instrument

lefts3

rightside4